space
Sometimes sitting down to sew a whole quilt or a stack of blocks can be daunting, especially with crazy schedules (or a quilt "to do list" a mile long). I was thinking...why don't we pick a night that works best for each of us and sew a few snowballs (get it..sew instead of throw ok, you all know me by now!). If we do a few snowballs a week, before you know it, we'll have enough to put together a whole quilt and just in time for winter.
space
Grab my button (see it up there in the top right) if you'd like to participate. It will be linked to all the posts I will be doing along the way for tips and tricks with snowballs and inspirational pictures.
space
I don't do well with the codes, so you just need to...
- highlight the button and save it to your picture file.
- go to your layout section of your dashboard and click add gadget
- click add picture
- then just fill it in with the title, picture and link (url) to the snowball post, then save it
- easy, easy well easy for me because I don't do codes. It took an act of God just to get the button made without photo shop, but that's a whole different post!
space
Sew...let it snow, let it snow, let it snow!!
space
This is the basic tutorial for a snowball block. As I add more information to this event, there will be different block configurations that go along with the snowball block!
space
First, I am starting with an 8 1/2" block. The larger of the squares will end up being your actual snowball.
space
 space
spaceYou will also need 4 squares cut at 3 inches.
space
 space
spaceIf you would like to make different sizes of snowballs you can follow this guideline
- 5" snowball (charm pack) you will need 4 corner squares at 2"
- 6 1/2" snowball...you will need 4 corner squares at 2 1/2"
- 10" snowball (layer cake) you will need 4 corner squares at 3 1/2"
space
Now, back to sewing...draw a line in pencil from corner to corner on each smaller square.
space
Place all 4 squares on the snowball right sides together. Pin if you'd like.

This is an extra step, but oh so worth it for the bonus blocks in the end. Mark a dot a 1/2" away from the first line.

and draw that in pencil too.

Now sew on all the lines.

Use your center guide line on your machine to help you along the way. The diagonal line is so easy to follow with a guide line or tape on your machine, you might not need the pencil line once you get going.

Here are the four main lines all sewn. I left the strings on to show you a tip...

Much like chain piecing, sew a line, lift your presser foot, pull on the thread a little and then bring your next square to the needle without cutting it. Saves thread and saves that bunching up thing on the back that happens when you begin a new stitch.

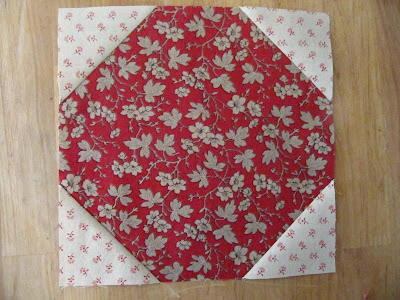
Here is the finished snowball all sewn up.

Now cut between the 2 lines. Because the space is 1/2" wide each piece should have a 1/4 seam.

Press all 4 corners.

Then lift up each square and press back.

Tah Dah!!! This snowball is so much better than the other kind!

Now press those little extras that we cut off. Press open to the darker fabric. There will be other posts about these little gems later. These will square up to 2".

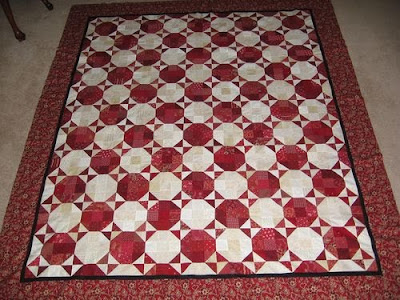
Now for a little inspiration to get you started... Three very generous ladies have allowed me to share their photos of their absolutely beautiful snowball quilts. You must visit their blogs, they are AMAZING!
space
First, is Nicole from Sister's Choice Quilts. Aren't these just beautiful. If you look through her archives under 1-22-2010, 7-7-2009, 10-22-2007 and 9-18-2007, that's where I found these photos. Actually, you just have to look through her whole blog, because every picture is better than the last!


This stunning quilt is from Twin Fibers. A wonderful blog from twin sisters Jennifer and Jessica. Their blog is just spectacular...you have to go visit. The photographs are amazing, as is every project they post about. This quilt is from their 1-14-2010 post. Just the prettiest quilt and the fabric...to die for.


0 comments:
Post a Comment